

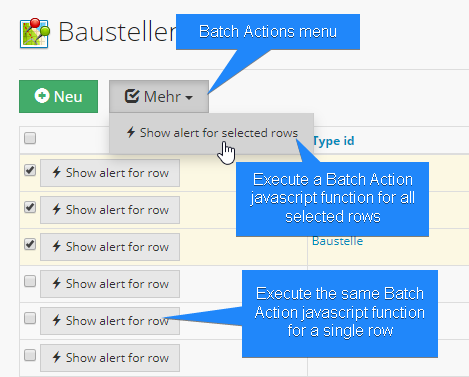
With Batch Actions you can execute a javascript function for all selected rows in a Table View. In this step-by-step guide I am going to show, how add a button to every table view row and execute an existing batch action on button click for that specific row.
The following video show the possibilities you have with Batch Actions and additional buttons per row:
Illustration
If you already have a working batch action script integrated in your TABLENAME-tv.js file, you can skip steps 1 and 2 and directly head over to step 3.
Table of Contents
Step 1: Create Batch Action javascript function
If you don't already have it, create a file hooks/TABLENAME-tv.js and write your javascript function. Replace TABLENAME by your specific table name.
Please note the suffix -tv which stand for "table view".
// file: hooks/TABLENAME-tv.js
//                       ^
//                       +--- attention: tv = tableview
// the batch function itself
// two parameters:
// 1. tablename
// 2. array of primary keys
function myBatchAction1(tn, ids) {

    // just show an alert box with tablename and selected primary keys
    alert("Table: " + tn + "\r\n" + "Selected IDs: " + ids);

}
Save the javascript file.
Step 2: Add function-call to the Batch Actions menu
For integrating this Batch Action javascript function into the Batch Actions menu, open the file hooks/TABLENAME.php and find the function named TABLENAME_batch_actions(). Usually this is the last function at the very bottom of the hooks file.
For the new Batch Action, add a definition to the array which will be returned by the function. Replace TABLENAME by your specific table name.
function TABLENAME_batch_actions(&$args)
{
	return [
		[
			"title" => "Show alert for selected rows",
			"function" => "myBatchAction1",
			"icon" => "flash"
		]
	];
}
Save the php file.
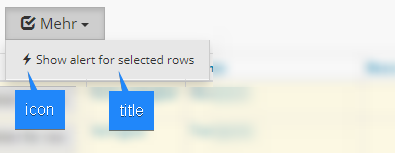
For every Batch Action you will need three parameters:
title
This will become the menu item title- Name of the
function
This has to exactly match with the function name given in step 1. Use identical character casing.
I recommend naming functions in camelCase. - Name of the (Glyph-)
iconwithout glyphicon- prefix
If the icon's name isglyphicon-flash, just putflashas icon name.
At this step we have created a javascript function named myBatchAction1 and integrated it as Batch Action into the menu. We can test it now:
- Reload the table view page in your browser
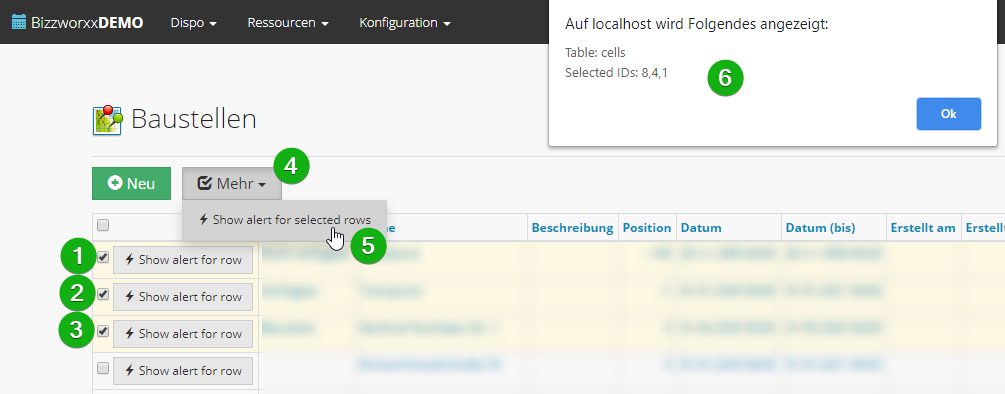
Please note: Depending on your permissions, the menu button may not be visible, yet - Select one or more rows by checking checkboxes in first column
If the menu button has not been visible at page load, it will appear as soon as you have selected at least one row. - The Batch Actions menu should contain your new menu item now.
- Click it
- Your function will be executed and an alert box should show your table's name and the primary key(s) of the selected record(s)
These were the important two steps for creating Batch Actions according to the AppGini documentation.
In the last step we are going to use the addButton function of AppGini Helper Javascript Library to add a new button in every row and bind the click-event to our already coded javascript function.
Step 3: Add button to every row and call Batch Action javascript function
Once again, open hooks/TABLENAME-tv.js (replace TABLENAME) and add the following code which automagically adds a new button to every row of your table view:
// add a button per table row
jQuery(function () {

    AppGiniHelper.TV.addButton(function (id) {
        // call our function, pass tablename and the (=one) primary key
        myBatchAction1('TABLENAME', id);
    }, "flash", "Show alert for row");

});
As first parameter of .addButton(fx)-function we pass in a function call. Later on, on click, our library will execute that fx-function and pass the primary key of the specific record into that function. Inside our fx-function itself, we can use the passed in id as variable.
In this case, within fx, we execute our function myBatchAction1.
Remember:
Our Batch Action function myBatchAction1 requires two parameters: Tablename and primary key(s) of selected records. So we also have to pass in those two parameters. That's why we execute myBatchAction1('TABLENAME', id);
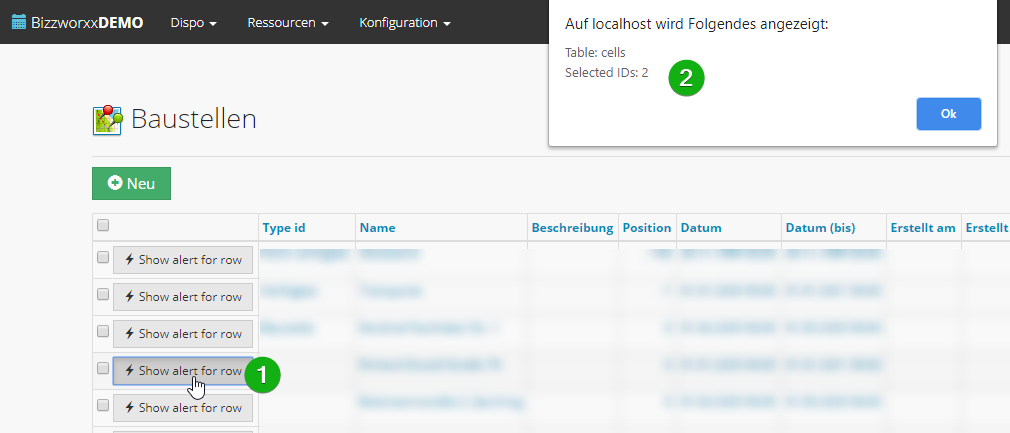
After step 2 we were able to execute our function for one or multiple selected records. Now, after step 3, we additionally (!) have a button per row and we can execute the same function per row.
That's it. You finally made it.
Pro-Tip
If you pass in 'TABLENAME' to the function, you will have to change the code whenever you rename the table. You can avoid this by using the built-in function AppGini.currentTableName() which returns the actual name of the current table view:
 // get the name of the current table
var tn = AppGini.currentTableName()

// call our function, pass tablename and the (=one) primary key
myBatchAction1(tn, id);
The whole optimized code of hooks/TABLENAME-tv.js:
// ...

function TABLENAME_batch_actions(&$args)
{
	return [
		[
			"title" => "Show alert for selected rows",
			"function" => "myBatchAction1",
			"icon" => "flash"
		]
	];
}
function myBatchAction1(tn, ids) {
    // just show an alert box with tablename and selected primary keys
    alert("Table: " + tn + "\r\n" + "Selected IDs: " + ids);
}

// add a button per table row
jQuery(function () {

    new AppGiniTableView().addButton(function (id) {

        // get the name of the current table
        var tn = AppGini.currentTableName()

        // call our function, pass tablename and the (=one) primary key
        myBatchAction1(tn, id);

    }, "flash", "Show alert for row");

});